Catia adapter - Tutorial
Table of Contents
Introduction
In the tutorial section, you will see how to use the software performing basic tasks.
Getting Started
To get started 2 simple tasks are required to be accomplished.
Starting Catia
Run your Catia and open a CAT Product file.
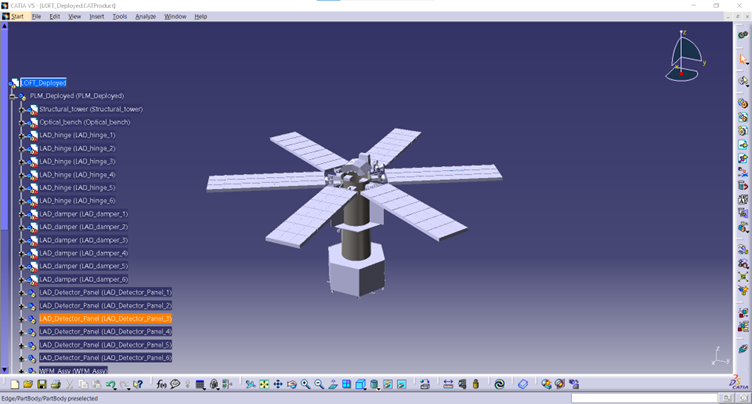
Figure 2:Catia with a model open
Starting the Adapter
Run the DEHCatia.exe from the location where you have previously unzipped the adapter zip file.

Figure 3:The Catia v5 adapter install location.
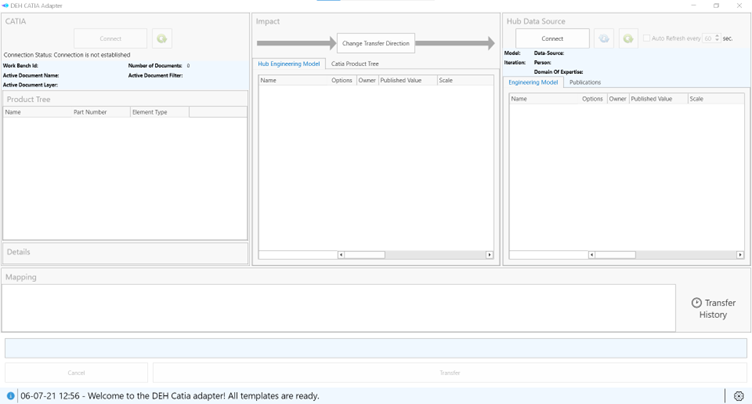
Figure 4:The main window at start
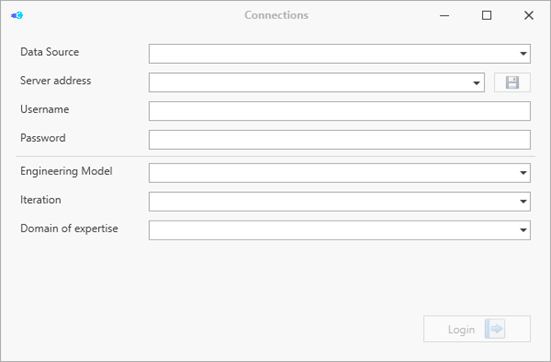
Figure 5:Connecting to a COMET® server and opening an Iteration.
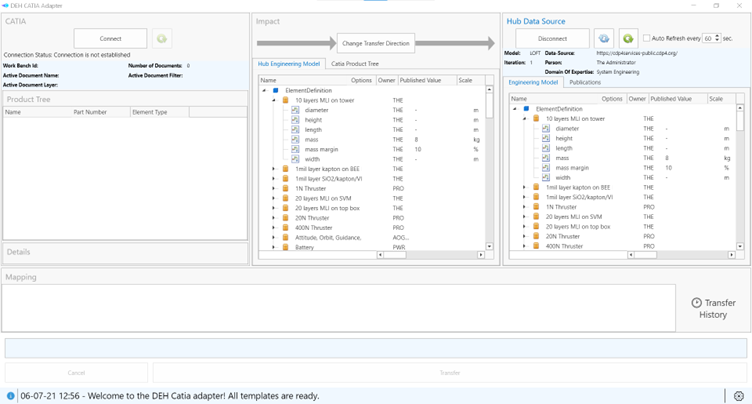
Figure 6:The main window with the ElementDefinition tree after opening an Iteration.
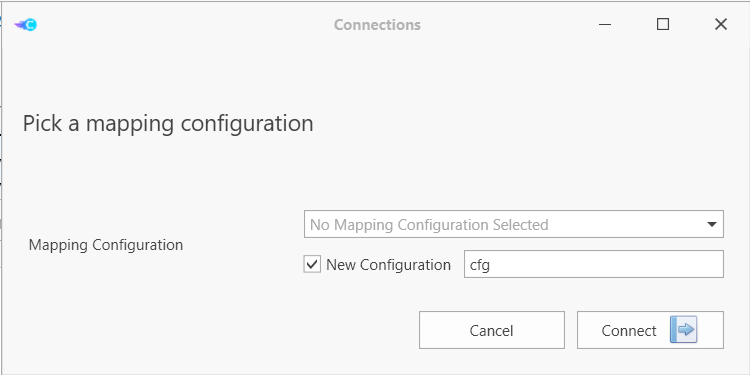
Figure 7:Connection to a Catia instance
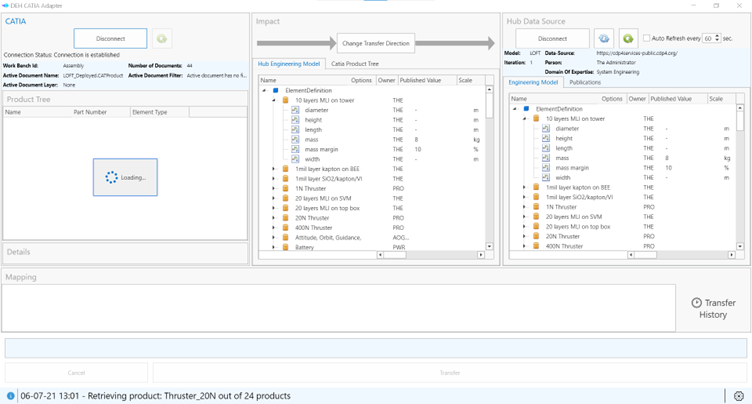
Figure 8:The Catia model is loading.
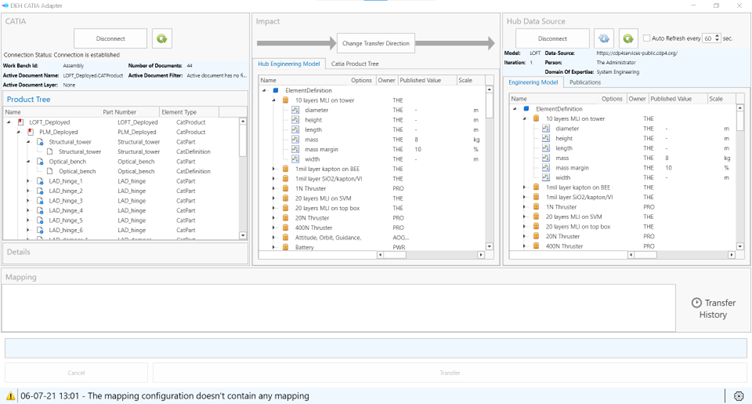
Figure 9:The main window with both data source connected.
Using the Software on a Typical Task
Mapping from Catia v5 to E-TM-10-25
- First, change the transfer direction so that the mapping source is the Catia Data Source.
- Select one Element to be mapped with its children in the Catia product tree in the adapter.
- Right click on your selection and select “Map Selection”.
- Map one of the Catia element to one ElementDefinition.
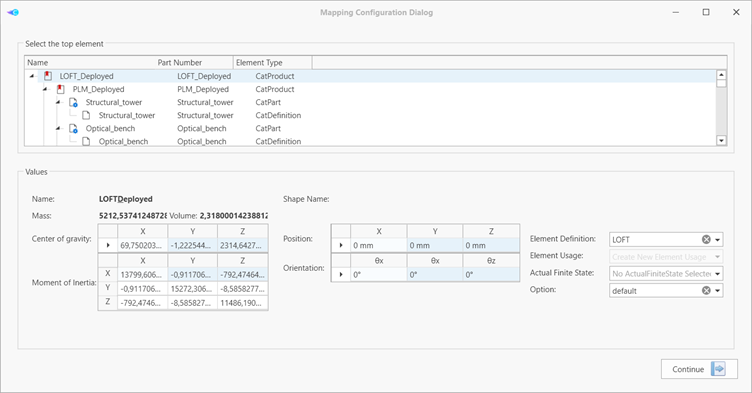
Figure 10:Mapping the selected element to an ElementDefinition.
Notice that all ComboBox shown on Figure 10 are read-only but searchable.
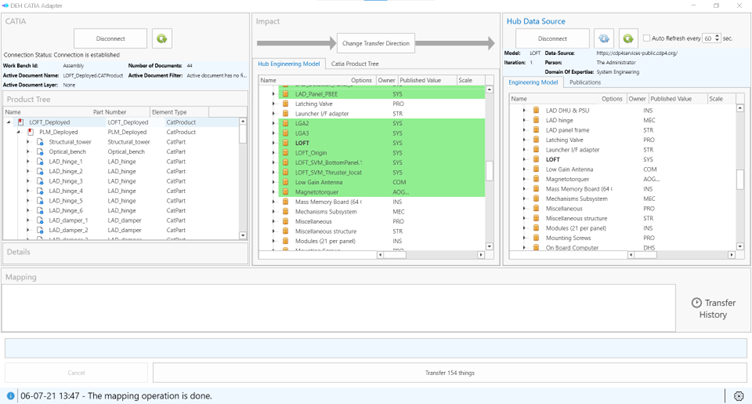
Figure 11:The value has been mapped and the relevant trees are highlighting the differences.
At this stage all the mapped elements are selected to be transferred but you select among the mapped element of what element you want to transfer. This can be achieved by manually select each element or by using the context menu like shown in the Figure 12.
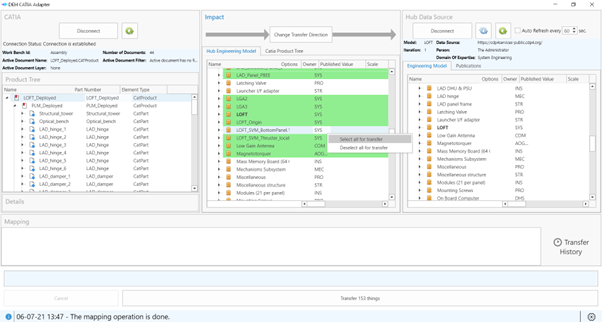
Figure 12:Impact view context menu
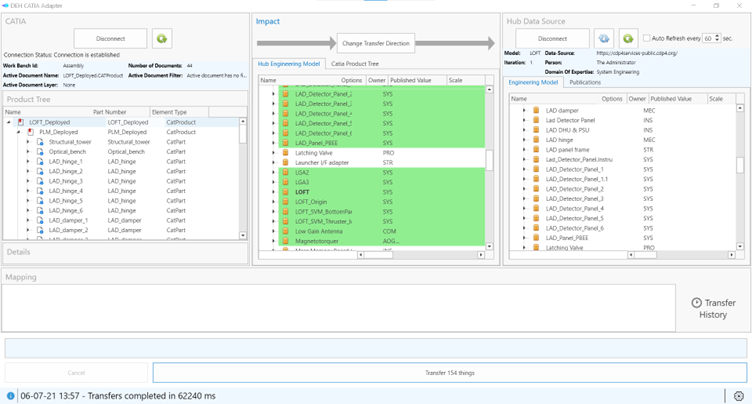
Figure 13:Confirmation that the transfer went as expected.
The Figure 13: shows that the transfer has completed, and that the mapping configuration has been reloaded and applied.
Mapping from E-TM-10-25 to Catia v5
General Mapping
- First, change the transfer direction so that the mapping source is the hub Data Source.
- Select some ElementDefinitions. If the selected ElementDefinitions contains compatible parameters such as the ones defined in
. Their values will be mapped as defined in
- Right click on your selection and select “Map Selection”.
- Map each ElementDefinition that you want to transfer to an existing Catia element or define a new element by selecting its parent in the Catia product tree.
Creating Catia element from a Hub element
- Create an ElementDefinition that contains a Parameter with a ParameterType where the short name is “kind” as described in
- Follow the step described in previous section except that the Catia Element that you select will then become the parent of the new Catia Element. And make sure you check the checkbox “Add a new part usage under the selected element”.
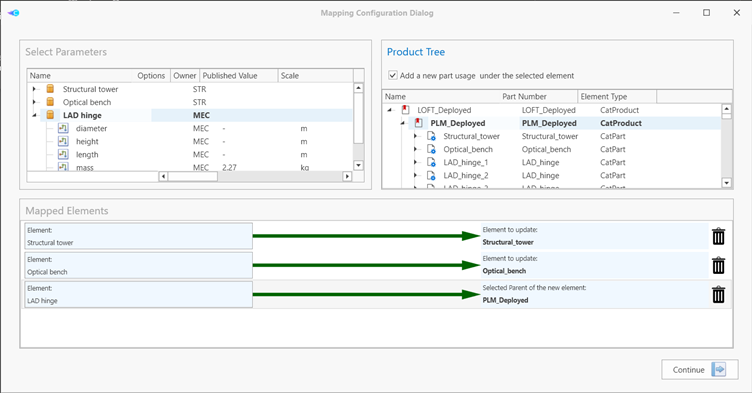
Figure 14:Mapping ElementDefinition to Catia Element.
The Figure 14 shows the mapping configuration window, where there is 2 ElementDefinitions that will update corresponding Catia element. But also, that a new LAD hinge will be added to the Catia model under the Catia element PLM_Deployed.
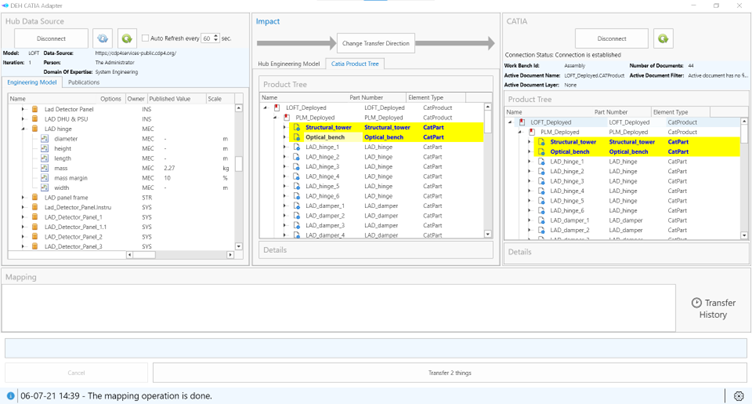
Figure 15:Preview of the defined mapping in Figure 14

Figure 16:Expected result of a transfer from E-TM-10-25 to Catia.
Reviewing the exchange history
The exchange history is available through the “Transfer History” button.
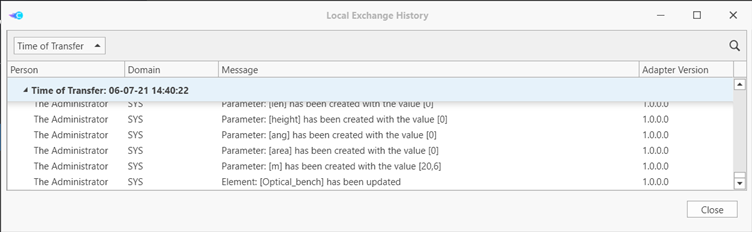 Figure 17:reviewing the exchange history